Roman Bath


*The website that I originally linked to in this post is no longer available. You can check out my other roman shade posts here and check back for more tutorials. If you get stuck, just comment down below and I'll get back to you.
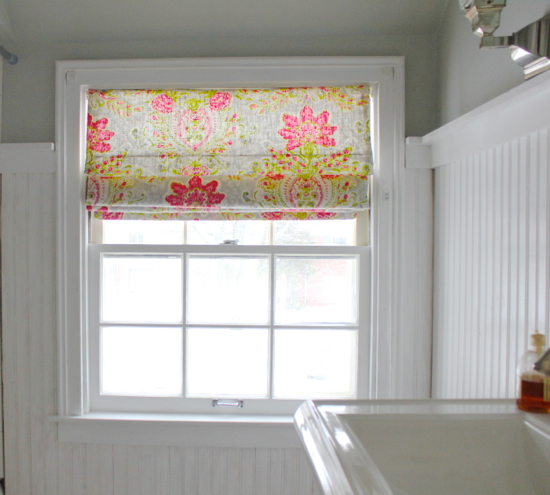
My shade is complete and I took lots of pictures!
To celebrate my 12th handmade Roman shade, I jotted down some notes and took pictures to share.

First step... measure, draw a sketch and write down some notes.
My shade is an inside mount, so I measured the inside of the window only (mine is 34 3/4"L x 40"W). I like to use the calculator on this site* to figure out how to cut fabric and what hardware I'll need. This is also where I buy my mounting hardware.

Here's a diagram of how I measure the window for an inside mount shade. Window widths can vary from top to bottom, so I measure at the middle. Measurements for an inside mount Roman shade must be very precise. If the shade is too wide, it will get stuck on the frame when rolling up or down. Too narrow and you'll have a noticeable gap between the edge of your shade and window frame and your shade won't be so shady. Too long and the shade will puddle at the apron. Too short and again you won't have full coverage.

You also need to make sure you have at least a 1" width at the head of your inside casing (2" for a top down/bottom up shade). Pull the bottom sash of your window all the way up and make sure there is room for the 1" thick mounting board.


Find a nice clean workspace and very carefully cut your front fabric and lining. This part still makes me sweat! I like to use tailor's chalk to mark my measurements before cutting. If you have a large print on your fabric, you may want to center the design instead of measuring from the raw edges.

Make a 3" inch double hem at the bottom of both the liner and the front fabric. Press, pin and ...

sew the hems. I don't use a weight rod in the lining's hem for a small to medium shade like this.

I put the liner and top fabric (decorative stuff) right sides facing and match up the edges on one side, pin and sew with a 1" seam allowance. Then match up the opposite edges.
To avoid having the liner dip below the front of your shade, place its hem bottom 1" above the bottom of the front fabric hem before you sew up the sides.
Next, I pulled the liner over to meet the front fabric side and pinned those edges together and sewed with a 1" seem allowance. I made sure the width of the shade was still the desired size. If things are a little off, I just use a narrower or wider seem allowance on the second edge. If they are way off, you're best off ripping that first side seem and adjusting that seem allowance, too. You don't want to go through all this work and then find out that your shade is way too narrow or wide.

After flipping the shade right side out, I pressed the seems.

I used Mod Podge to glue on the battens. Again, I used this site to figure out where to place them.

That's what the mounting board looks like with the flat pulleys screwed on. For this shade, I used 3 flat pulleys. I placed two of them about two inches from the end of the board and the third in the middle. I could have placed these on the narrow edge of the 1"x2" board, but I find that this way it's easier to mount this board to the window casing using 1.5" wood screws.
I sewed on 3 lift rings at every other batten. I used my mounting board with flat pulleys installed to mark where to sew the rings (they have to line up). I prefer to use a staple gun to attach the shade to the top of the mounting board. Try and test out where you'll staple by holding up the shade and mounting board in window first. Make sure every thing looks straight before you staple shade in place.
Last step is stringing the shade. Tie on the cord to the bottom lift rings, run them through the lift rings above them and run through the flat pulleys. All 3 cords should run out the flat pulley on the right or left side (your choice). Thread the three strings through the cord drop and tie a couple of knots to secure.
If you haven't already, screw in the cord cleat on the window casing or wall. You'll wrap the cord around the cord cleat to keep the shade in place.

Hardware I used (see end of post for shopping details):
cord drop (the wooden handle), 2 wood screws that are 1.5 times longer than the width of your mounting board, lift rings, flat pulleys (3 for this size shade), lift cord, button thread (for sewing on the lift rings), a cord cleat and screws to mount hardware.
I went to the hardware store to buy a 1"x2" board and had it cut 1/4" shorter than the width of the inside of my window.
I also bought 6 wooden dowels and followed the hardware calculator measurements (link above) to cut
Tools I used:
Sewing machine
Scissors
Tailor's chalk
Button thread and needle for lift rings
Drill
Staple gun
Fabric:
I used a 1.5 yards of cotton drapery fabric + equal amount of muslin
If you want to protect your fabric from fading then you'll need drapery lining

I'm going back upstairs now to admire my shade!
p.s. Click here to see how my bathroom looks completed. Yay!
If you're looking for diagrams and more detailed instructions, I put up a new post about making an unlined shade here.
For flat pulley, cord, cord cleats and lift rings: I've bought from a few different online stores. Google around and see what kind of deals you can find.
For flat pulley, cord, cord cleats and lift rings: I've bought from a few different online stores. Google around and see what kind of deals you can find.
Wood for mounting board, dowels and stiffener board can be purchased from home improvement stores like Lowe's and Home Depot.

